
Thursday, January 27, 2011

Exam Post.
Part A of Question 91.
Composition is how something is placed into a picture, for example, you could have composition in form. So it a picture has nice light that comes from an angle at the side then you can see the texture made from the light. Like take a piece of wood for example. If the light is coming from the side then you can see the grooves of the wood, and the grain of how it runs perfectly. To say composition just deals with one thing would be silly since there are many things that factor into composition, those are:
Lighting: This effects the outcome of the picture, because if the light is coming from the back then the shadows would cover the subjects face, thus casting them into shadows. The direction of the light matters, for example one of the best natural lights to use is when its coming from the North. Light from the north is generally softer, making the subject sit in a light that isn't covered in shadows, nor too direct.
Rule of Thirds: Rule of thirds is another thing to take into consideration when taking a picture. When you're going to take a picture you should think of it being split into a grid like formation. Then you figure where the subject is. You don't want the subject center in the picture or else it throws off any other beauty that can be found.
F Stop Settings: These effect the focus of the picture, the smaller the lens opening the more focus there is in the picture taking in a wider area. Where as larger the opening the less in focus the background is and the more in focus the subject is.
Lighting: This effects the outcome of the picture, because if the light is coming from the back then the shadows would cover the subjects face, thus casting them into shadows. The direction of the light matters, for example one of the best natural lights to use is when its coming from the North. Light from the north is generally softer, making the subject sit in a light that isn't covered in shadows, nor too direct.
Rule of Thirds: Rule of thirds is another thing to take into consideration when taking a picture. When you're going to take a picture you should think of it being split into a grid like formation. Then you figure where the subject is. You don't want the subject center in the picture or else it throws off any other beauty that can be found.
F Stop Settings: These effect the focus of the picture, the smaller the lens opening the more focus there is in the picture taking in a wider area. Where as larger the opening the less in focus the background is and the more in focus the subject is.
Tips
- Remember to shoot in a light that isn't harsh, check where the light is before shooting.
- Keep in mind you need to get close to get good pictures.
- The faster the speed the faster you get a picture, but that doesn't guarantee that it's a good picture.
- Make sure that enough light is in the area when you're taking a picture, or put your Flash on auto so it fills out the shadows on its own.
- Remember not to get too close to the subject when taking a picture with flash, or have them look away so that red eye is not given.
- The best type of light is North Light.
- Have fun when taking a picture!
Part B of Final Blog Post.
Shutter Speed: Shutter speed allows you to take a picture at a certain speed as the name says. The higher the setting the faster the speed of the shutter. A lot of the faster shutter speeds are used for pictures where there's movement, for example during sports. Where as if a lower shutter speed was used for such a thing then it would be blurred, and more than likely not a good picture.
Aperture: The setting that effects how much light goes through. For example you could have a low aperture setting thus get a small amount of light. Aperture, does take effect on all pictures taken and is needed to get the right light.
Aperture: The setting that effects how much light goes through. For example you could have a low aperture setting thus get a small amount of light. Aperture, does take effect on all pictures taken and is needed to get the right light.
Thursday, December 16, 2010
Tuesday, December 7, 2010
Photoshop assignment

Can you find me? (The one with three dogs on a leash)
 Wolirsetiox
(Wolf head, lion mane, horse legs, tiger body, and fox tail)

Edited Movie Poster adding Johnny Depp as the lead.
(Original Picture: http://images2.fanpop.com/images/photos/5200000/Dorian-Gray-upcoming-movies-5287443-695-849.jpg)
Monday, December 6, 2010
Paul Nicklen Prezi
He's a Canadian Photographer who takes pictures of the Canadian North.
Many of his pictures are beautiful an awespiring.
Prezi: http://prezi.com/mj3wr22lanud/paul-nicklen/
Many of his pictures are beautiful an awespiring.
Prezi: http://prezi.com/mj3wr22lanud/paul-nicklen/
Thursday, November 25, 2010
Three point lighting

Three Point Lighting


Taylor, Larissa and Colin! (Picture taken by: Vennetta Haas)


Vennetta Haas (Picture taken by Larissa Watson)
Three point lighting uses three lights. The main light is called the Key Light. The key light is the major light source on the set, located at one side of the subject. In a talk show this light is positioned over people's head. The Fill Light is the second light it is used to fill in the shadows that the key light created. Its supposed to give the scene a more natural feel to it. The back light is placed behind the subject at the same height as the key light. This light adds depth into the photo. Using this style of lighting, you're giving the photo depth.
Natural Light Portraits


Just laughing, having a good time.

Colin posing for the camera.
 Natural light. :D
Monday, November 22, 2010


Thursday, November 18, 2010
Nov 18 2010

Taylor

Colin walking on the bridge.

Taylor and Colin running.

Shadows in the front of the school

The trees with the snow.

Snowman, the nose created by a cig butt.

I thought the blues were beautiful together, making the clouds have that light fluffy look to them.

Taylor and Colin taking shots of the sky.

Outside with the fresh snow~
Wednesday, November 17, 2010
Modeling for light tests.

Light from the back of the picture.

Frontal image.

Light from the side.

Expression was a little off, but it wasn't too bad. (:
Tuesday, November 16, 2010
PICTURES. :D

Colin and Alex. (Barbarian and Horse rider?)

Head shot.
 Randa and I. :)
Adventures with a little red hat.
Friday, October 29, 2010
October 29 2010
Halloween week. It was a rather goood week, we were assigned a project while Wrigley was away. It had some sad pictures in it. When people say pictures are worth a thousand words, they honestly weren't joking. Which words would you get from an image of American Soilders scaring small children, burning away their clothing, making them run in fear for their very lives. Its interesting but kind of frightening when you think about it. The pictures captured moments of history that could change the world.
Friday, October 22, 2010
October 22, 2010
This week I learned about how to make my photograms. I took some pieces that I thought would look really nice on it and then placed the glass down. The piece of paper with the word 'Love' on it appeared rather blured, the only thing that could be seen. And then we made our contact sheet, it was horrible, just plain out horrible. But next time, things will improve. :D
Thursday, October 14, 2010
October 14th 2010

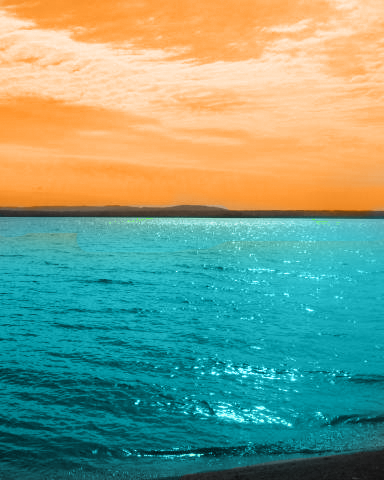
Okay, so we had to develop the black and white pictures, right? I think Vennetta and I got light on them some how, and now they're all dark. Light exposure made, what would of been nice pictures ruined. It looked almost like something had fogged them up. Although, we did have the teacher help us remove the reel, so I'm not too sure what went wrong in the process. It must of been while doing the fixture for the pictures on the negatives. Due to the photos being ruined as they were, we have to take a whole new reel of photos.
This saddened me a bit since Vennetta and I had figured out how to use the self timer on the camera to get a group picture. Now that picture is ruined thanks to the fog. I don't think even trying to enlarge the picture would make it look any better, and that in its-self is a dang shame. Then when trying our hardest, you know what our effort gained us? A -1. That's horrible, and is more of a pity pass than anything, but a mark none the less.
The photograms were nice looking too. I like how the exposure looks. Black and glossy it was rather pretty when I thought back on it. I like how the one had a necklace on it with the small heart. The other photograms were nice enough, although I have to say that one was my favorite.
Thursday, October 7, 2010
October 7th


Sorry that I was absent yesterday, but I did get other pictures while away on my absence. They were out at Natchewana, Whispering pines where my cabin is at. I went there for an hour for photo's yesterday afternoon and got a few shots. I learned how to use the different styles for taking pictures.
Thursday, September 30, 2010
Sept 30, 2010


For this week we had an assignment of landscape, action, and depth photos. ^^
I also learned how the focal point on the camera works.
The top right picture is an animated picture I made on photoshop, I used the layering tool, burn, colour, inverted, used re-size and modifed the clipart for it.
Friday, September 24, 2010
Friday Sept 24, 2010


Today I went out with the camera and took pictures around the school. I learned how to use the lens to increase clarity in images.
Subscribe to:
Posts (Atom)